An herbal DIY facial is a fantastic way to nurture your skin naturally, offering a refreshing and non-toxic alternative to store-bought products. Not only does it promote healthy, radiant skin, but it’s especially beneficial for acne-prone skin, as the gentle herbs help cleanse, calm, and balance the complexion. Plus, it’s fun and empowering to craft your own skincare treatments at home using simple, plant-based ingredients! While a regular herbal facial is great for daily upkeep, don’t forget to seek a professional cosmetologist for deep cleaning and specialized care from time to time to ensure your skin stays in top condition – especially for pigmentation or superficial scarring. And of course, we have to treat the skin from the inside out, so it’s important to address underlying causes of acne such as detoxification and hormone balance.
1. Cleansing
Start your facial by gently cleansing your skin to remove impurities and excess oil. You can use a diluted castile soap, or try oil cleansing. Or you can look for gentle cleansers on the market with the following ingredients (my personal favorite right now is the Golden Milk from Apis Apotheca).
Herbal Cleanser Ingredients:
- Neem (Azadirachta indica): Known for its antibacterial properties, neem helps purify the skin.
- Manjistha (Rubia cordifolia): A powerful herb for clearing skin and promoting a healthy complexion.
- Olive Leaf (Olea europaea): Offers antioxidant protection and gently cleanses.
How to Use:
- Take a small amount of your natural herbal cleanser or oil.
- Gently massage it onto your face and neck in circular motions.
- Rinse with lukewarm water to remove dirt and impurities.
2. Exfoliating
Exfoliating removes dead skin cells, leaving your skin feeling fresh and smooth.
Herbal Exfoliant Ingredients:
- Oatmeal: Gently scrubs the skin while soothing irritation → see recipe for a gentle Oat/Almond scrub
- Sugar: Exfoliates and helps retain moisture.
- Sea Salt: Helps cleanse and stimulate circulation.
*Or for an extra crunchy option, use a dried Queen Anne’s Lace top or similar herb to gently scrub the skin.
How to Use:
- Apply the exfoliant to your damp face and massage for about 30 seconds.
- Focus on areas that tend to get more oil or buildup, like the T-zone.
- Rinse with lukewarm water for a soft, polished complexion.
3. Steaming
Steaming opens up your pores, allowing herbal properties to deeply cleanse and refresh your skin.
Herbal Steaming Ingredients:
- My personal favorites are witch hazel, calendula, sage, and rose petals
- Optional: Chamomile, Lavender
How to Use:
- Fill a pot with water and add your chosen herbs.
- Bring the water to a boil, then let it simmer for about 10 minutes.
- Lean over the steam, covering your head with a towel to trap the steam.
- Inhale the soothing herbs for 5-10 minutes, allowing your pores to open and your skin to absorb the benefits.
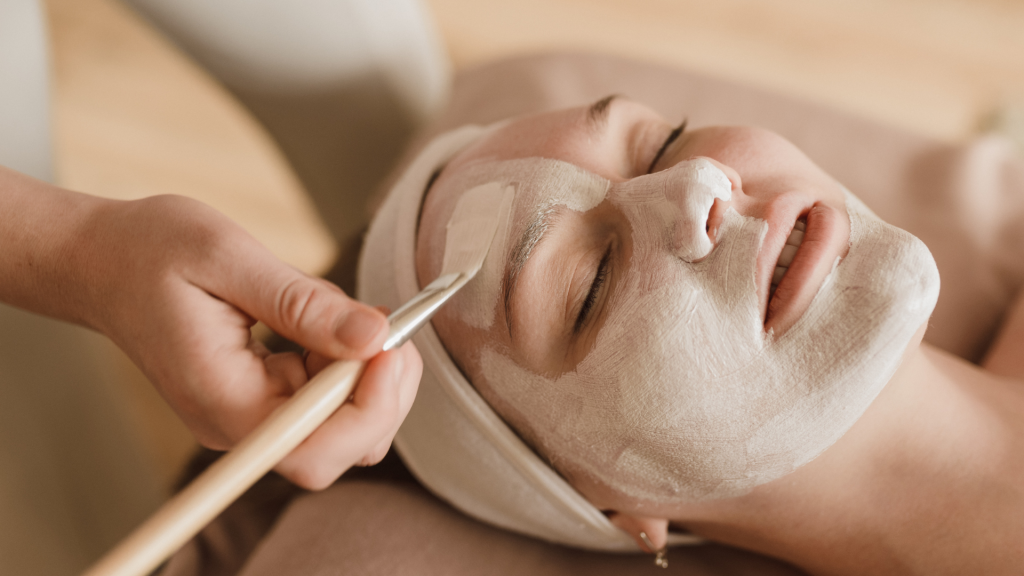
4. Masking
Herbal masks help target skin issues while providing deep hydration and nourishment.
Herbal Mask Options:
- Turmeric and Yogurt: Brightens the skin and reduces inflammation.
- Rosewater and Sandalwood: Soothes and cools the skin while evening out complexion.
- Aloe Vera and Coconut Oil: Hydrates and nourishes, great for dry or sensitive skin.
- Try this easy recipe for clay or avocado-based options
How to Use:
- Apply your chosen mask evenly over your face and neck.
- Leave the mask on for 10-20 minutes, allowing the herbal ingredients to absorb.
- Rinse with lukewarm water to reveal soft, glowing skin.
5. Toning
Toning helps balance your skin’s pH and tightens pores, giving you a refreshed feel.
Herbal Toner Options:
- Rosewater: Naturally hydrating and calming.
- Green Tea: Rich in antioxidants, it tightens and tones the skin.
- Witch hazel: Shrinks enlarged pores to prevent blackheads.
How to Use:
- After rinsing off your mask, apply toner to a cotton pad.
- Gently wipe it over your face and neck to refresh and rebalance your skin.
Optional: Icing
Icing with herbal ice cubes helps tighten pores, reduce inflammation, and refresh your skin, leaving it feeling cool and invigorated.
How to Use Herbal Ice Cubes:
- Prepare the Ice Cubes:
- Choose your desired herbs, such as rose petals, calendula, sage, plantain leaf, or green tea.
- Brew a tea with them, and freeze in ice cube molds. Can also add a splash of aloe vera for extra hydration!
- Wrap the Cubes:
- Before applying to your face, wrap an ice cube in a thin clean cloth such as a cotton handkerchief. This prevents direct contact with your skin, which could cause redness or irritation.
- Before applying to your face, wrap an ice cube in a thin clean cloth such as a cotton handkerchief. This prevents direct contact with your skin, which could cause redness or irritation.
- Apply to the Face:
- Gently apply the wrapped ice cube to your face, focusing on areas with open pores or where you feel redness or inflammation.
- Move the ice cube in gentle circular motions for 1-2 minutes, allowing the cooling sensation to calm and tighten the skin.
6. Moisturizing (Optional)
Moisturizing helps keep your skin hydrated and nourished, especially after exfoliating and masking.
Herbal Moisturizer Options:
- Almond Oil: Softens and moisturizes without clogging pores.
- Jojoba Oil: Mimics the skin’s natural oils, helping balance moisture levels.
- Check out Apis Apotheca, my go-to local company for all-natural herbal serums and moisturizers
How to Use:
- Apply a small amount of your herbal moisturizer to your face and neck.
- Gently massage in upward strokes to lock in hydration.
7. Sun Protection
Don’t forget to protect your skin from harmful UV rays.
Herbal Sun Protection:
- Choose a natural sunscreen with Zinc Oxide or Titanium Dioxide for broad-spectrum protection.
How to Use:
- After moisturizing, apply a natural sunscreen to your face and neck.
- Reapply throughout the day for continued sun protection.🌿✨
